2023. 12. 30. 20:10ㆍ모바일어플개발/Flutter 실전어플 개발
안녕하세요~ totally 개발자입니다.
오늘은 파이어베이스 Cloud Firestore(클라우드 데이터베이스)를 사용하여 제품들을 담고 불러오도록 하겠습니다.
Step 1: 먼저 파이어베이스에 접속하셔서 왼쪽에 "모든 제품"을 클릭하시고 Realtime Database를 클릭해줍니다.
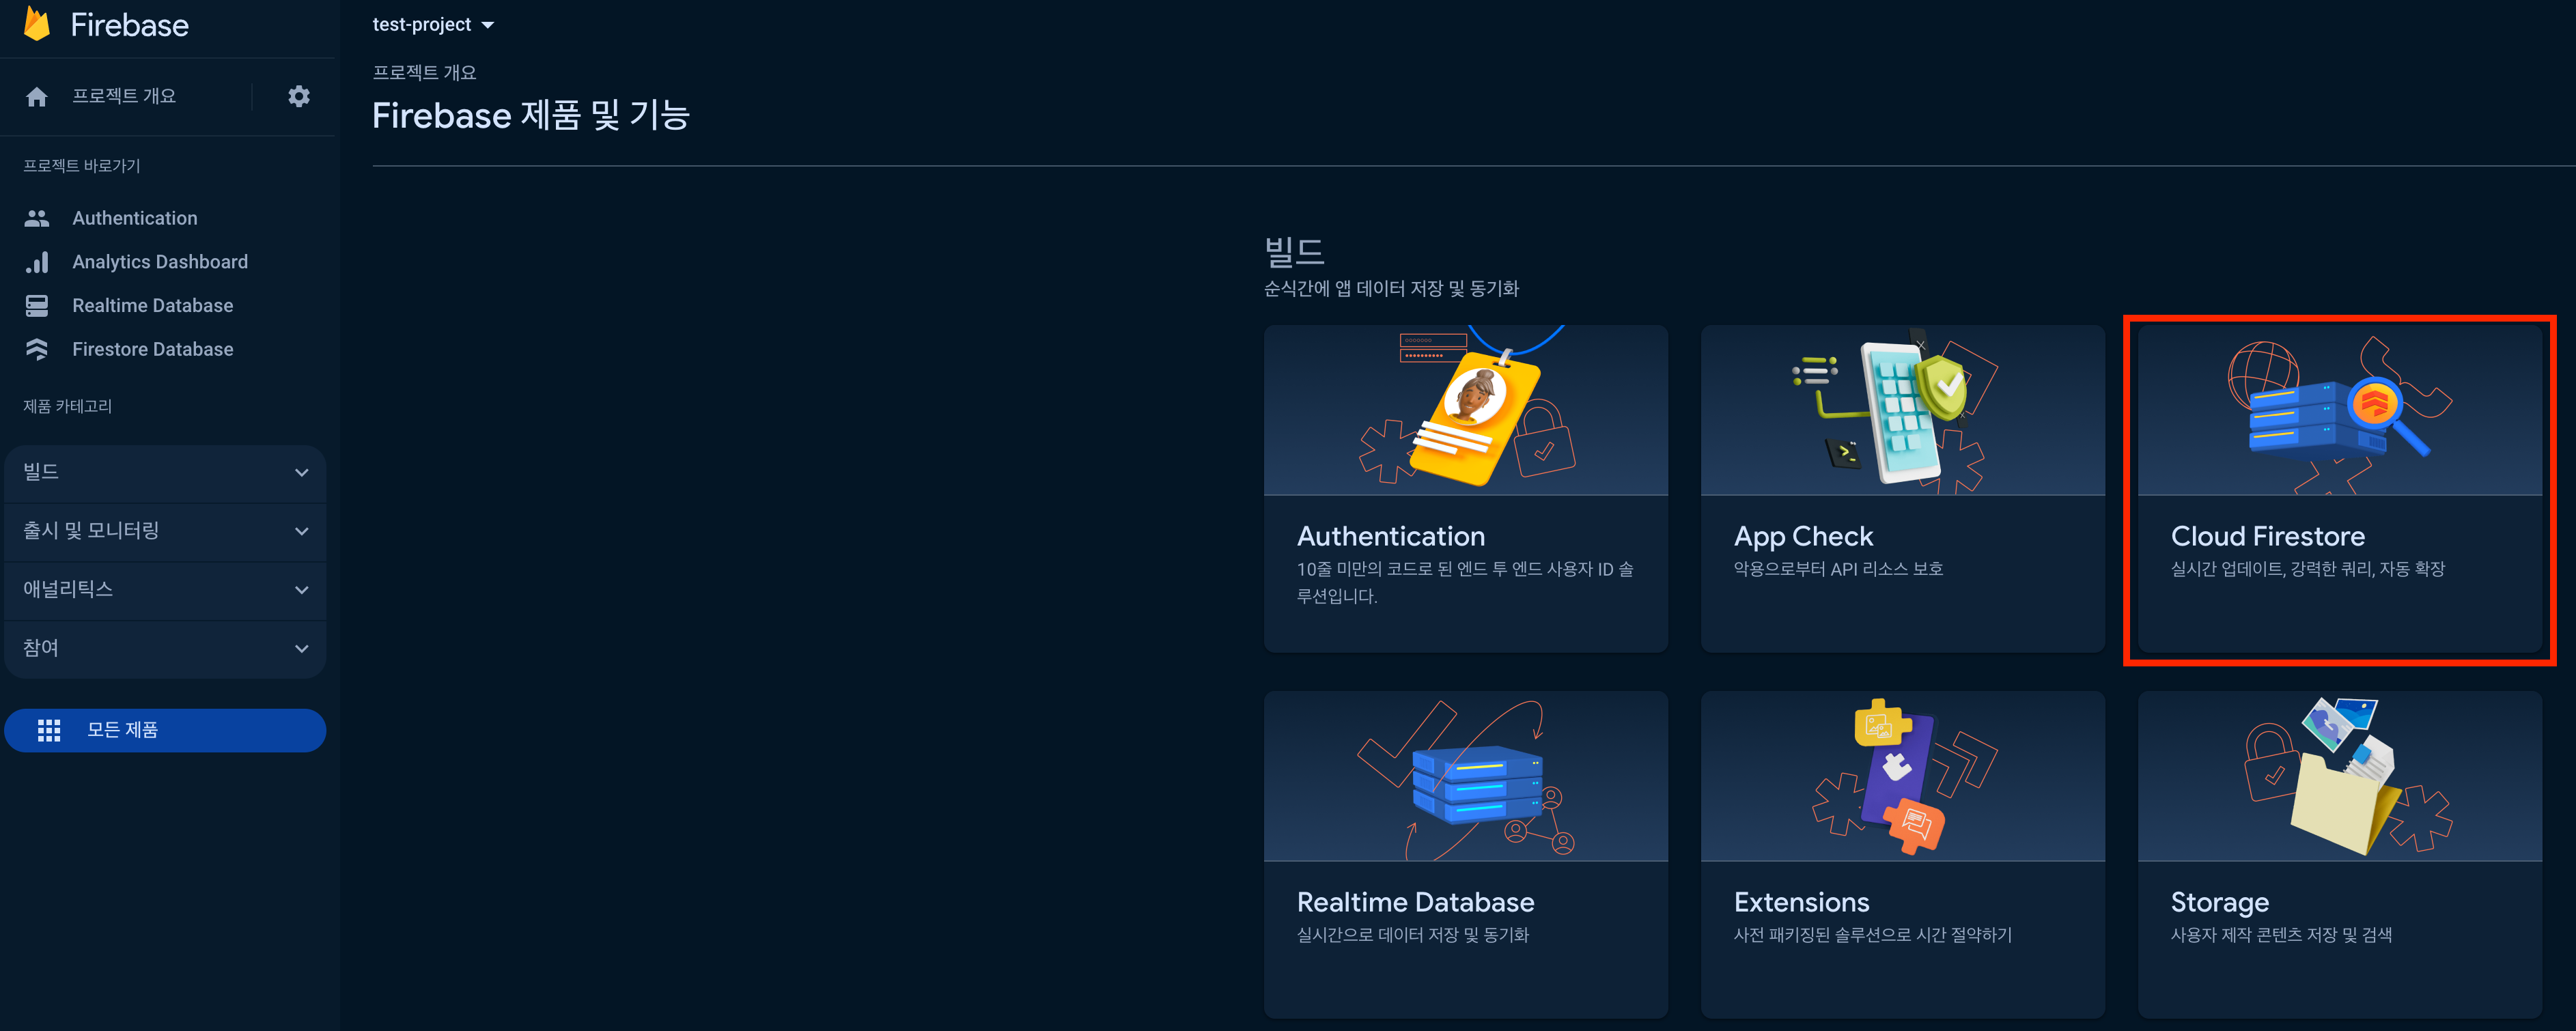
Step 2: "데이터베이스 만들기" 버튼을 눌러줍니다.

Step 3: 위치를 asia-northeast3 (Seoul)로 설정합니다.
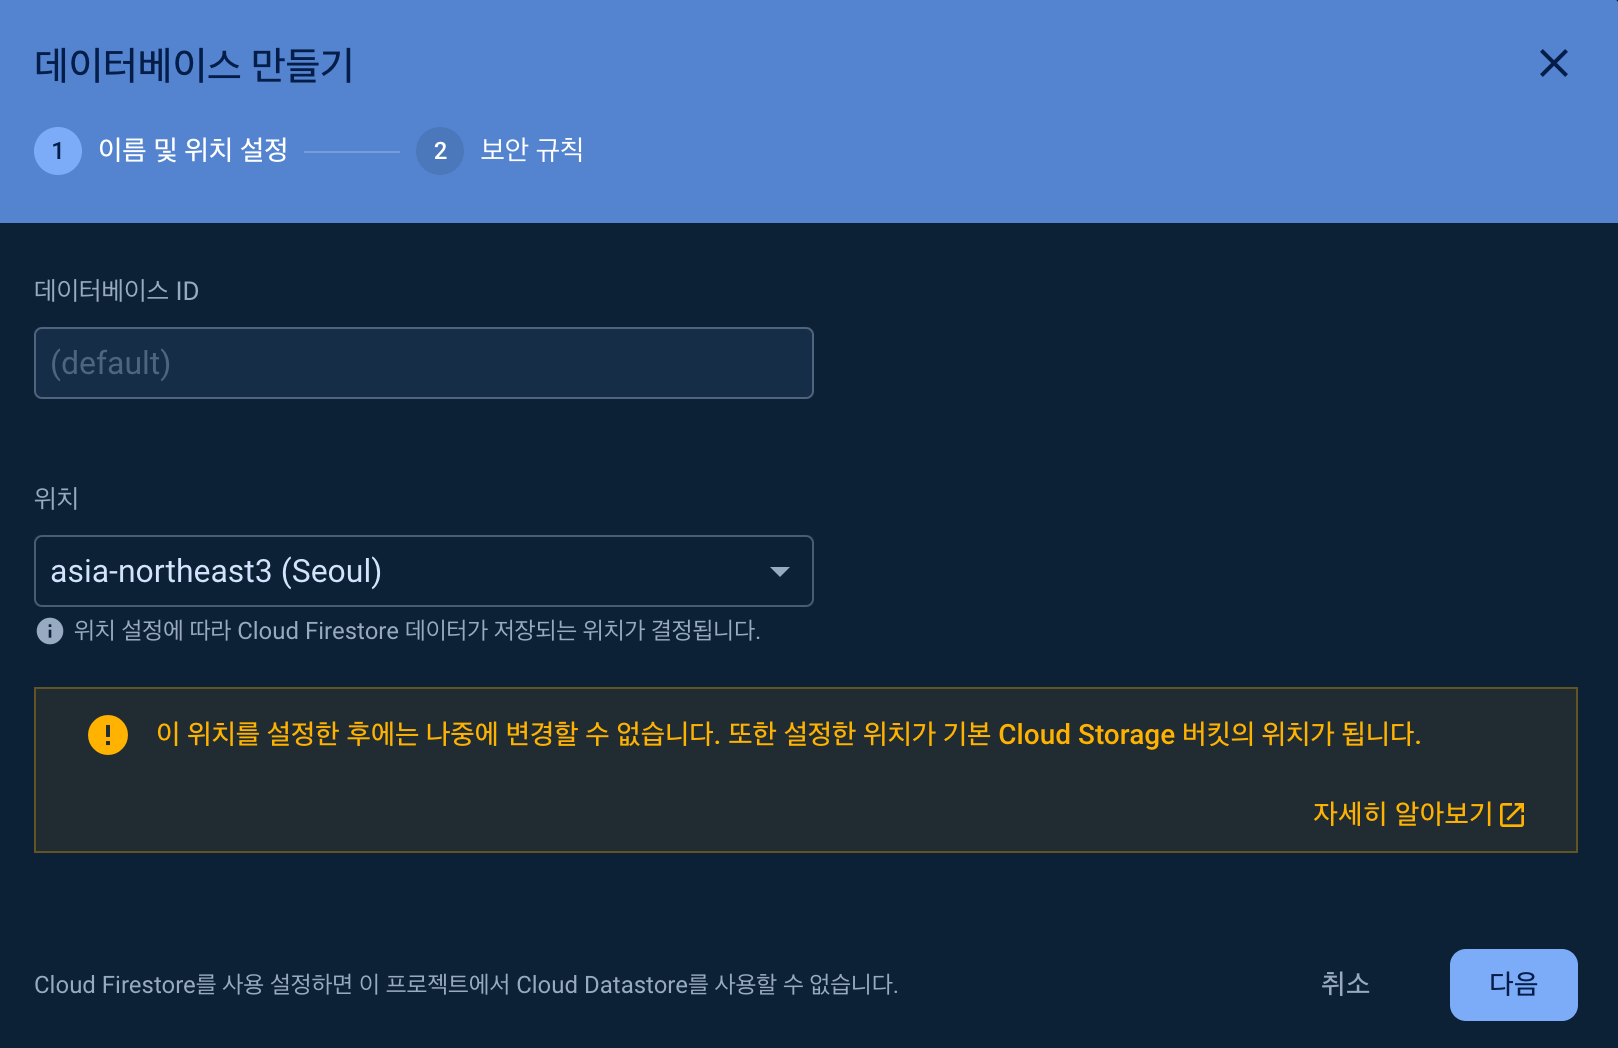
Step 4: "프로덕션 모드에서 시작"으로 하고 "사용 설정"을 클릭합니다.

Step 5: "컬렉션 시작"을 눌러 컬렉션 ID에 products로 입력하고 "다음"을 눌러줍니다. Firestore의 구조는 Collection이 있고 그 하위에 Document가 있습니다. 하나의 컬렉션에 여러 개의 문서를 담는 구조입니다.

Step 6: 예전 productList에 나와 있는대로 문서 ID는 자동 ID로 지정하시고 나머지는 아래처럼 지정하여 저장합니다.
List<Product> productList = [
Product(
productNo: 1,
productName: "노트북(Laptop)",
productImageUrl: "https://picsum.photos/id/1/300/300",
price: 600000),
Product(
productNo: 2,
productName: "스마트폰(Phone)",
productImageUrl: "https://picsum.photos/id/20/300/300",
price: 500000),
Product(
productNo: 3,
productName: "머그컵(Cup)",
productImageUrl: "https://picsum.photos/id/30/300/300",
price: 15000),
Product(
productNo: 4,
productName: "키보드(Keyboard)",
productImageUrl: "https://picsum.photos/id/60/300/300",
price: 50000),
Product(
productNo: 5,
productName: "포도(Grape)",
productImageUrl: "https://picsum.photos/id/75/200/300",
price: 75000),
Product(
productNo: 6,
productName: "책(book)",
productImageUrl: "https://picsum.photos/id/24/200/300",
price: 24000),
];


"저장"을 누르면 아래처럼 문서가 추가된 것을 확인해볼 수 있습니다. 계속 "문서 추가"를 눌러 다른 제품들도 모두 같은 방식으로 추가합니다.

아래는 모두 추가된 모습입니다.

Step 7: pubspec.yaml에 39번째 줄처럼 cloud_firestore 패키지를 설치합니다. (작성일 기준 최신 버전은 4.13.6입니다)

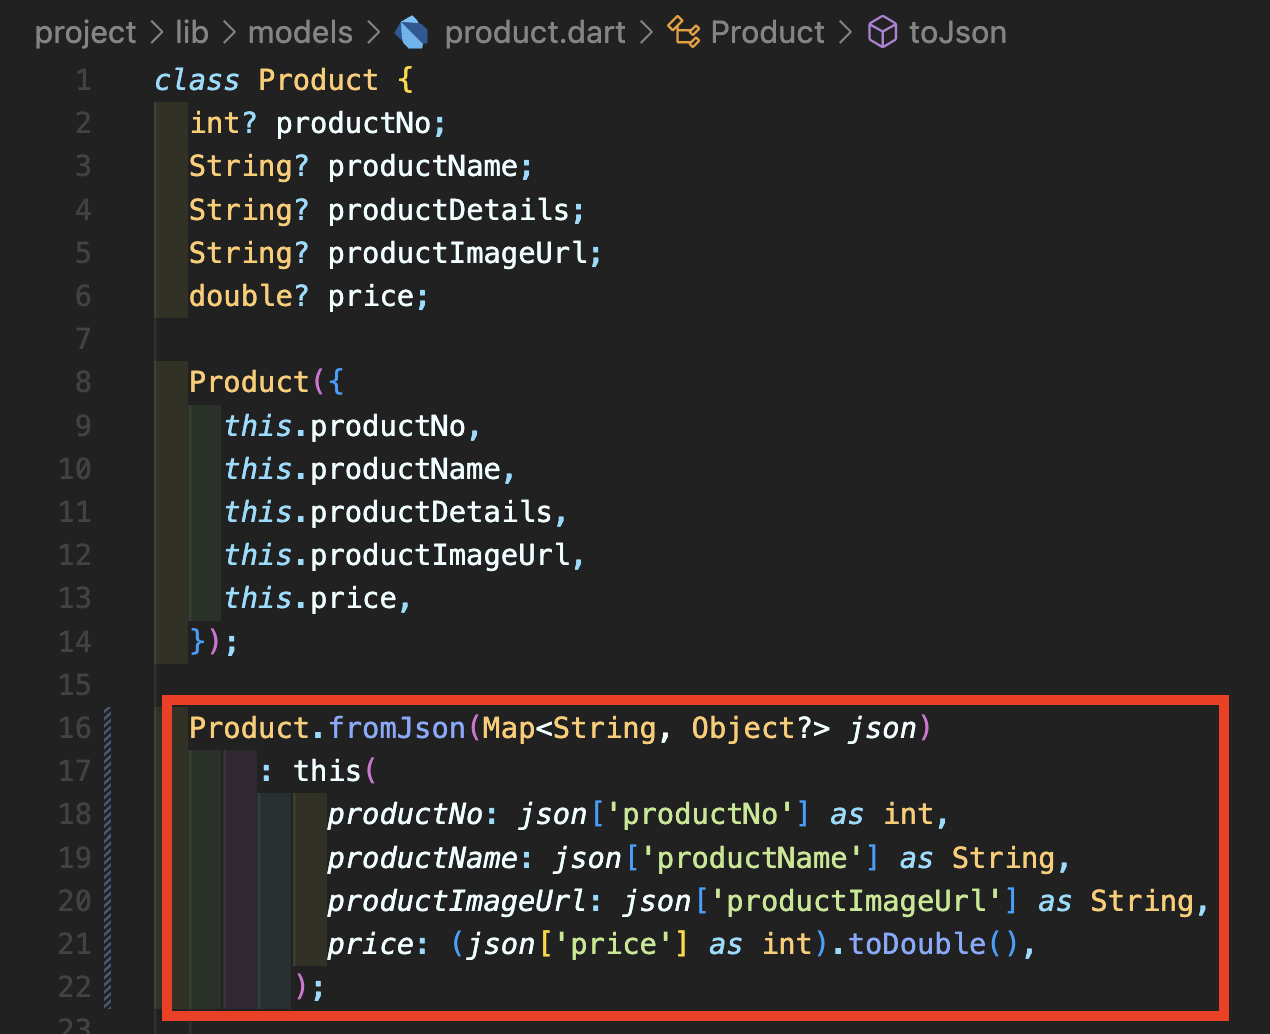
Step 8: lib/models/product.dart 파일을 열어서 fromJson 메소드를 아래처럼 수정합니다. 현재 productDetails 변수는 사용하지 않습니다. 파이어베이스 firestore에서 price는 소수점으로 저장된 것이 아니어서 일단 int로 받은 뒤 double로 변경합니다.
Step 9: item_list_page.dart 파일을 열어주시고 아래처럼 코드를 삽입합니다.

여기에서 FirebaseFirestore.instance를 통해 데이터베이스에 접근하고 collection("컬렉션이름")을 이용하여 해당 컬렉션의 모든 Document들을 가지고 올 수 있습니다. .doc("해당다큐먼트ID")를 사용하면 특정 Document를 가지고 올 수 있습니다만 여기에서는 전체 제품들을 가지고 오기 때문에 .doc은 빼고 바로 withConverter 메소드를 사용합니다. 이 withConverter를 사용해서 fromFirestore, toFirestore 옵션을 사용할 수 있게 해주고 이미 Step 8에서 Product 객체를 사용해서 데이터를 저장할 수 있도록 변경하였으므로 바로 Product.fromJson(snapshot.data()!)으로 작성해줍니다. 뒤에 느낌표 !가 붙는 것은 null을 허용하지 않는다는 의미입니다. 만약에 여기 null이 되면 해당 부분 실행시 오류로 표시됩니다.
Step 10: body 부분을 아래처럼 수정해서 반영합니다. StreamBuilder와 GridView를 같이 활용해서 작업하면 되고 여기에서 stream 부분에 productListRef.orderBy 메소드를 통해 어떤 데이터열로 정렬할 것인지 지정할 수 있습니다(오름차순), 만약 내림차순이라면 orderBy("productNo", descending: true)로 넣어주면 됩니다. 기존 GridView.builder를 일반 GridView로 변경하시고 children 부분에 snapshot에서 받아온 데이터들을 map 메소드를 사용해서 리스트로 만들어주면 됩니다.

Step 11: 만약 실행시 아래처럼 권한 이슈가 나오는 경우라면 아래처럼 Cloud Firestore의 규칙에 들어가셔서 아래 빨간 상자로 표시한 것처럼 true로 변경하시고 "게시"하시면 됩니다.


Step 12: 실행한 모습입니다.

다음 포스팅에서는 결제 완료되었을 때 파이어베이스 Firestore에 기록해보도록 하겠습니다.
[전체 소스 코드]
[product.dart]
class Product { | |
int? productNo; | |
String? productName; | |
String? productDetails; | |
String? productImageUrl; | |
double? price; | |
Product({ | |
this.productNo, | |
this.productName, | |
this.productDetails, | |
this.productImageUrl, | |
this.price, | |
}); | |
Product.fromJson(Map<String, Object?> json) | |
: this( | |
productNo: json['productNo'] as int, | |
productName: json['productName'] as String, | |
productImageUrl: json['productImageUrl'] as String, | |
price: (json['price'] as int).toDouble(), | |
); | |
Map<String, dynamic> toJson() { | |
final Map<String, dynamic> data = {}; | |
data['productNo'] = productNo; | |
data['productName'] = productName; | |
data['productDetails'] = productDetails; | |
data['productImageUrl'] = productImageUrl; | |
data['price'] = price; | |
return data; | |
} | |
} |
[item_list_page.dart]
import 'package:flutter/material.dart'; | |
import 'package:cached_network_image/cached_network_image.dart'; | |
import 'package:project/constants.dart'; | |
import 'package:project/item_basket_page.dart'; | |
import 'package:project/item_details_page.dart'; | |
import 'package:project/models/product.dart'; | |
import 'package:project/my_order_list_page.dart'; | |
import 'package:cloud_firestore/cloud_firestore.dart'; | |
class ItemListPage extends StatefulWidget { | |
const ItemListPage({super.key}); | |
@override | |
State<ItemListPage> createState() => _ItemListPageState(); | |
} | |
class _ItemListPageState extends State<ItemListPage> { | |
final productListRef = FirebaseFirestore.instance | |
.collection("products") | |
.withConverter( | |
fromFirestore: (snapshot, _) => Product.fromJson(snapshot.data()!), | |
toFirestore: (product, _) => product.toJson()); | |
@override | |
Widget build(BuildContext context) { | |
return Scaffold( | |
appBar: AppBar( | |
title: const Text("제품 리스트"), | |
centerTitle: true, | |
actions: [ | |
IconButton( | |
icon: const Icon( | |
Icons.account_circle, | |
), | |
onPressed: () { | |
Navigator.of(context).push(MaterialPageRoute( | |
builder: (context) { | |
return const MyOrderListPage(); | |
}, | |
)); | |
}, | |
), | |
IconButton( | |
icon: const Icon( | |
Icons.shopping_cart, | |
), | |
onPressed: () { | |
Navigator.of(context).push(MaterialPageRoute( | |
builder: (context) { | |
return const ItemBasketPage(); | |
}, | |
)); | |
}, | |
), | |
], | |
), | |
body: StreamBuilder( | |
stream: productListRef.orderBy("productNo").snapshots(), | |
builder: (context, snapshot) { | |
if (snapshot.hasData) { | |
return GridView( | |
gridDelegate: const SliverGridDelegateWithFixedCrossAxisCount( | |
childAspectRatio: 0.9, crossAxisCount: 2), | |
children: snapshot.data!.docs.map((document) { | |
return productContainer( | |
productNo: document.data().productNo ?? 0, | |
productName: document.data().productName ?? "", | |
productImageUrl: document.data().productImageUrl ?? "", | |
price: document.data().price ?? 0, | |
); | |
}).toList(), | |
); | |
} else if (snapshot.hasError) { | |
return const Center( | |
child: Text( | |
"오류가 발생했습니다.", | |
), | |
); | |
} else { | |
return const Center( | |
child: CircularProgressIndicator( | |
strokeWidth: 2, | |
), | |
); | |
} | |
}), | |
); | |
} | |
Widget productContainer( | |
{required int productNo, | |
required String productName, | |
required String productImageUrl, | |
required double price}) { | |
return GestureDetector( | |
onTap: () { | |
Navigator.of(context).push(MaterialPageRoute( | |
builder: (context) { | |
return ItemDetailsPage( | |
productNo: productNo, | |
productName: productName, | |
productImageUrl: productImageUrl, | |
price: price); | |
}, | |
)); | |
}, | |
child: Container( | |
padding: const EdgeInsets.all(5), | |
child: Column( | |
children: [ | |
CachedNetworkImage( | |
height: 150, | |
fit: BoxFit.cover, | |
imageUrl: productImageUrl, | |
placeholder: (context, url) { | |
return const Center( | |
child: CircularProgressIndicator( | |
strokeWidth: 2, | |
), | |
); | |
}, | |
errorWidget: (context, url, error) { | |
return const Center( | |
child: Text("오류 발생"), | |
); | |
}, | |
), | |
Container( | |
padding: const EdgeInsets.all(8), | |
child: Text( | |
productName, | |
style: const TextStyle( | |
fontWeight: FontWeight.bold, | |
), | |
), | |
), | |
Container( | |
padding: const EdgeInsets.all(8), | |
child: Text("${numberFormat.format(price)}원"), | |
), | |
], | |
), | |
), | |
); | |
} | |
} |
[유튜브 강의 영상]
https://youtu.be/MJkDiJY27sE?si=uBM_W_iSS8CErQ3P
References:
https://firebase.google.com/docs/firestore/query-data/get-data?hl=ko#dart_6
Cloud Firestore로 데이터 가져오기 | Firebase
Firebase 데모 데이가 시작되었습니다. Google 최고의 기술을 활용하여 AI 기반 풀 스택 앱을 빌드하고 성장시키는 방법에 관한 데모를 시청하세요. 의견 보내기 Cloud Firestore로 데이터 가져오기 컬렉
firebase.google.com
https://pub.dev/packages/cloud_firestore/example
cloud_firestore | Flutter Package
Flutter plugin for Cloud Firestore, a cloud-hosted, noSQL database with live synchronization and offline support on Android and iOS.
pub.dev
'모바일어플개발 > Flutter 실전어플 개발' 카테고리의 다른 글
[014] 플러터 (Flutter) 실전어플제작 - 쇼핑몰 앱 제작(로직구성6 - 주문 데이터 파이어스토어에 삽입하기) (4) | 2024.02.12 |
---|---|
[013] 플러터 (Flutter) 실전어플제작 - 쇼핑몰 앱 제작(로직구성5 - 장바구니, 결제시작 제품 데이터 파이어스토어 연동) (0) | 2024.01.13 |
[011] 플러터 (Flutter) 실전어플제작 - 쇼핑몰 앱 제작(로직구성3 - 파이어베이스 연동) (3) | 2023.12.21 |
[010] 플러터 (Flutter) 실전어플제작 - 쇼핑몰 앱 제작(로직구성2 - 장바구니 제품 수정) (3) | 2023.12.04 |
[009] 플러터 (Flutter) 실전어플제작 - 쇼핑몰 앱 제작(로직구성1 - 장바구니에 제품 담기) (2) | 2023.11.26 |