2023. 9. 28. 17:47ㆍ모바일어플개발/Flutter 실전어플 개발
안녕하세요~ totally 개발자입니다.
이번 시간에는 장바구니 페이지 UI 구성에 대해서 살펴봅니다.
Step 1: item_basket_page.dart 파일을 생성하여 다음처럼 뼈대를 만들고 시작합니다.

Step 2: 장바구니에 담긴 제품들을 표시할 ListView를 만들어주기 위해 Mock Data를 간단히 리스트 변수로 선언하여 줍니다. 먼저 UI에 중점을 두기 때문에 이렇게 하는 것이고 실제로는 이렇게 하면 안 되기 때문에 나중에 기능 부분을 구현할 때 이 부분은 당연히 수정할 것입니다. 먼저 기존 제품 리스트 변수처럼 2개 제품을 넣고, 27번째 줄에 quantityList를 별도로 만들어서 { key: value }를 { productNo: quantity } 형식으로 하여 제품 고유번호를 넣으면 quantity를 알 수 있도록 선언하였습니다. {1: 2}는 1번 제품의 수량이 2이고 {4: 3}은 4번 제품의 수량이 3개라는 뜻입니다. 일반 자바스크립트처럼 객체의 key, value와 Map를 먼저 이해하실 필요가 있습니다.

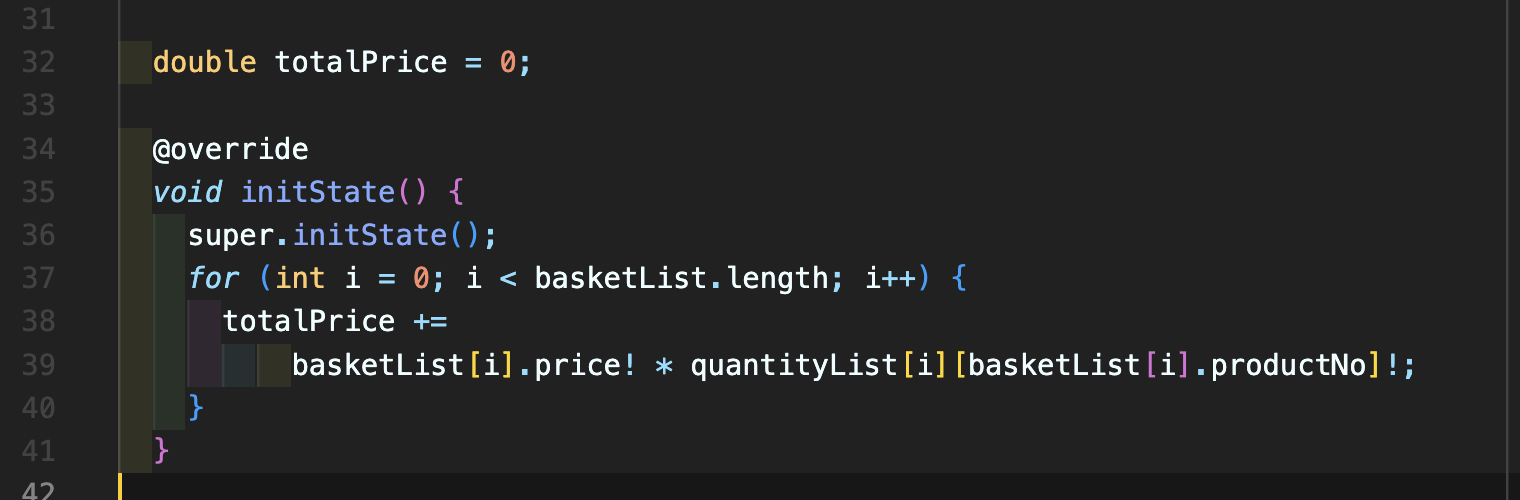
Step 3: 간단한 총액 계산을 위해 initState 메소드를 재정의해주시고 반복문 등을 활용하여 수식을 계산해줍니다. (이 부분도 추후 기능 업데이트를 할 때 수정될 수 있습니다)

Step 4: basketContainer 위젯을 아래처럼 만들어줍니다. 별도로 분리하셔도 되고 같은 페이지에 두셔도 됩니다. IconButton들을 미리 만들어두시고 추후 기능 부여 할 때 onPressed 속성에 기능 로직을 넣을 것입니다.
Widget basketContainer({ | |
required int productNo, | |
required String productName, | |
required String productImageUrl, | |
required double price, | |
required int quantity, | |
}) { | |
return Container( | |
padding: const EdgeInsets.all(8), | |
child: Row( | |
crossAxisAlignment: CrossAxisAlignment.start, | |
children: [ | |
CachedNetworkImage( | |
width: MediaQuery.of(context).size.width * 0.3, | |
fit: BoxFit.cover, | |
imageUrl: productImageUrl, | |
placeholder: (context, url) { | |
return const Center( | |
child: CircularProgressIndicator( | |
strokeWidth: 2, | |
), | |
); | |
}, | |
errorWidget: (context, url, error) { | |
return const Center( | |
child: Text("오류 발생"), | |
); | |
}, | |
), | |
Container( | |
padding: const EdgeInsets.symmetric(horizontal: 15, vertical: 8), | |
child: Column( | |
crossAxisAlignment: CrossAxisAlignment.start, | |
mainAxisSize: MainAxisSize.min, | |
children: [ | |
Text( | |
productName, | |
textScaleFactor: 1.2, | |
style: const TextStyle( | |
fontWeight: FontWeight.bold, | |
), | |
), | |
Text("${numberFormat.format(price)}원"), | |
Row( | |
children: [ | |
const Text("수량:"), | |
IconButton( | |
onPressed: () {}, | |
icon: const Icon( | |
Icons.remove, | |
)), | |
Text("$quantity"), | |
IconButton( | |
onPressed: () {}, | |
icon: const Icon( | |
Icons.add, | |
)), | |
IconButton( | |
onPressed: () {}, | |
icon: const Icon( | |
Icons.delete, | |
)), | |
], | |
), | |
Text("합계: ${numberFormat.format(price * quantity)}원"), | |
], | |
), | |
), | |
], | |
), | |
); | |
} |
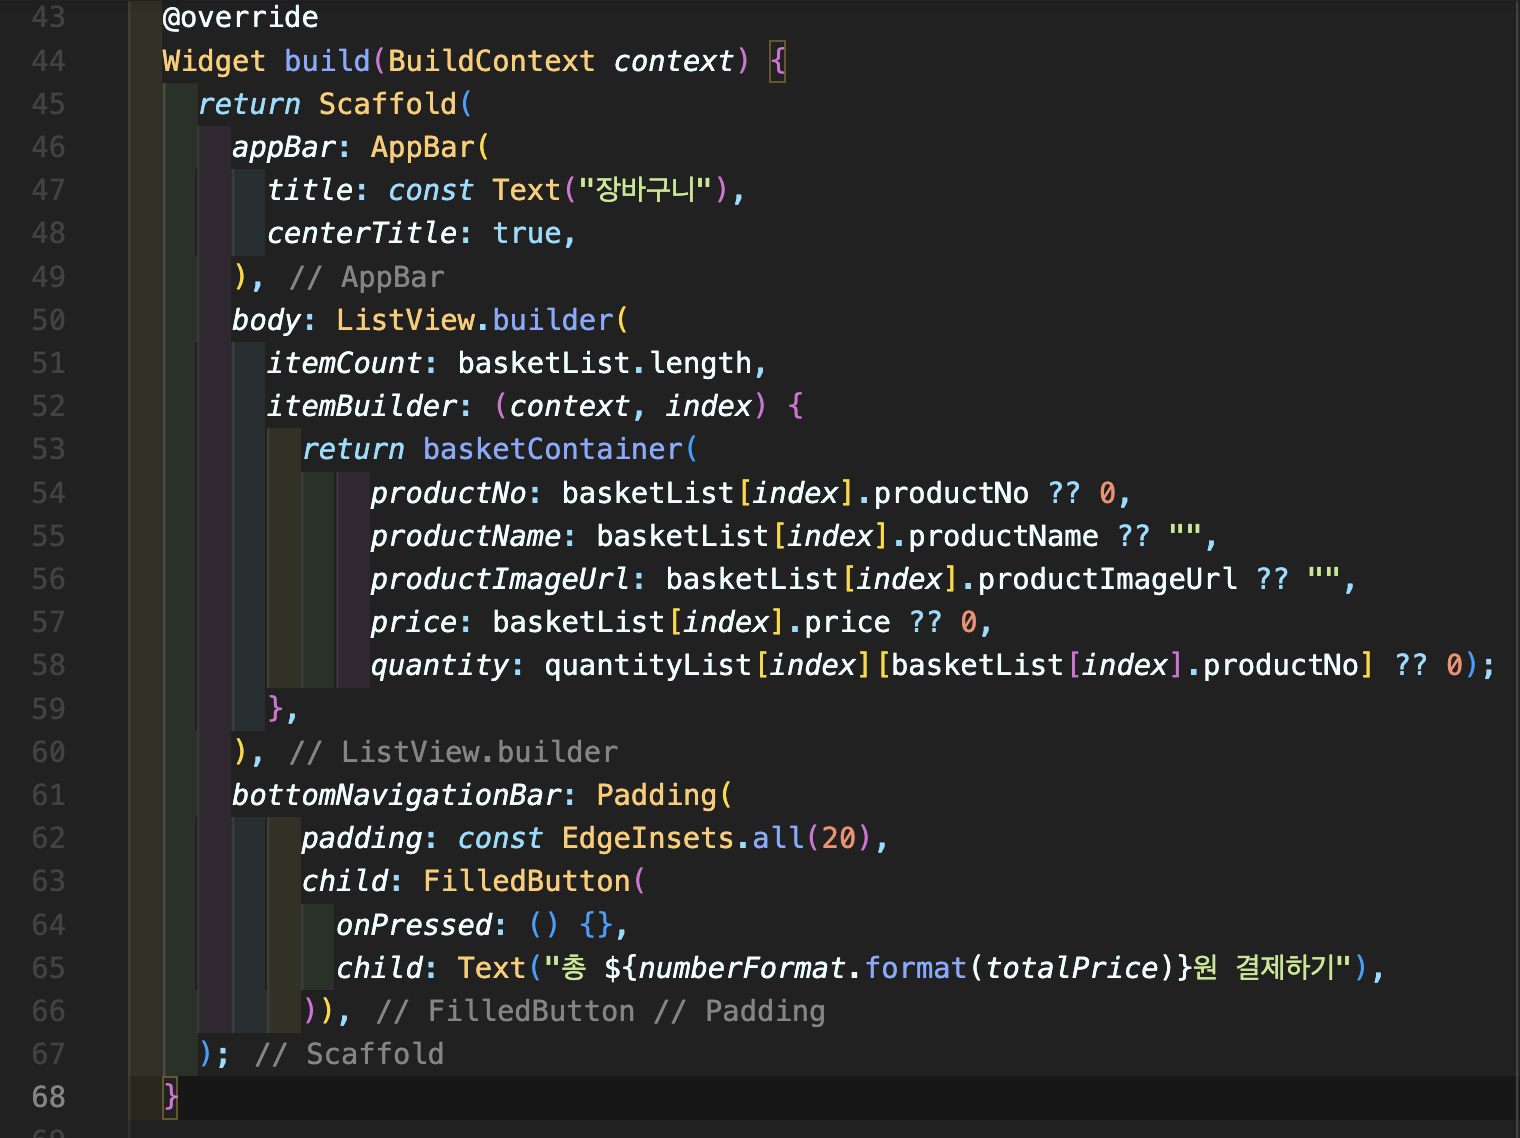
Step 5: 빌드 위젯을 다음처럼 채워주시고 bottomNavigationBar에 결제하기 버튼을 넣어서 마무리해줍니다.

Step 6: item_details_page.dart에서 장바구니 페이지로 이동할 수 있는 로직을 추가합니다.

Step 7: 실행해서 테스트 해본 모습입니다. 아직은 수량 등 기능부여를 하지 않았고 추후 기능 부여할 것입니다.

[전체 소스 코드]
[item_basket_page.dart]
import 'package:flutter/material.dart'; | |
import 'package:cached_network_image/cached_network_image.dart'; | |
import 'package:project/constants.dart'; | |
import 'package:project/models/product.dart'; | |
class ItemBasketPage extends StatefulWidget { | |
const ItemBasketPage({super.key}); | |
@override | |
State<ItemBasketPage> createState() => _ItemBasketPageState(); | |
} | |
class _ItemBasketPageState extends State<ItemBasketPage> { | |
List<Product> basketList = [ | |
Product( | |
productNo: 1, | |
productName: "노트북(Laptop)", | |
productImageUrl: "https://picsum.photos/id/1/300/300", | |
price: 600000), | |
Product( | |
productNo: 4, | |
productName: "키보드(Keyboard)", | |
productImageUrl: "https://picsum.photos/id/60/300/300", | |
price: 50000), | |
]; | |
List<Map<int, int>> quantityList = [ | |
{1: 2}, | |
{4: 3}, | |
]; | |
double totalPrice = 0; | |
@override | |
void initState() { | |
super.initState(); | |
for (int i = 0; i < basketList.length; i++) { | |
totalPrice += | |
basketList[i].price! * quantityList[i][basketList[i].productNo]!; | |
} | |
} | |
@override | |
Widget build(BuildContext context) { | |
return Scaffold( | |
appBar: AppBar( | |
title: const Text("장바구니"), | |
centerTitle: true, | |
), | |
body: ListView.builder( | |
itemCount: basketList.length, | |
itemBuilder: (context, index) { | |
return basketContainer( | |
productNo: basketList[index].productNo ?? 0, | |
productName: basketList[index].productName ?? "", | |
productImageUrl: basketList[index].productImageUrl ?? "", | |
price: basketList[index].price ?? 0, | |
quantity: quantityList[index][basketList[index].productNo] ?? 0); | |
}, | |
), | |
bottomNavigationBar: Padding( | |
padding: const EdgeInsets.all(20), | |
child: FilledButton( | |
onPressed: () {}, | |
child: Text("총 ${numberFormat.format(totalPrice)}원 결제하기"), | |
)), | |
); | |
} | |
Widget basketContainer({ | |
required int productNo, | |
required String productName, | |
required String productImageUrl, | |
required double price, | |
required int quantity, | |
}) { | |
return Container( | |
padding: const EdgeInsets.all(8), | |
child: Row( | |
crossAxisAlignment: CrossAxisAlignment.start, | |
children: [ | |
CachedNetworkImage( | |
width: MediaQuery.of(context).size.width * 0.3, | |
fit: BoxFit.cover, | |
imageUrl: productImageUrl, | |
placeholder: (context, url) { | |
return const Center( | |
child: CircularProgressIndicator( | |
strokeWidth: 2, | |
), | |
); | |
}, | |
errorWidget: (context, url, error) { | |
return const Center( | |
child: Text("오류 발생"), | |
); | |
}, | |
), | |
Container( | |
padding: const EdgeInsets.symmetric(horizontal: 15, vertical: 8), | |
child: Column( | |
crossAxisAlignment: CrossAxisAlignment.start, | |
mainAxisSize: MainAxisSize.min, | |
children: [ | |
Text( | |
productName, | |
textScaleFactor: 1.2, | |
style: const TextStyle( | |
fontWeight: FontWeight.bold, | |
), | |
), | |
Text("${numberFormat.format(price)}원"), | |
Row( | |
children: [ | |
const Text("수량:"), | |
IconButton( | |
onPressed: () {}, | |
icon: const Icon( | |
Icons.remove, | |
)), | |
Text("$quantity"), | |
IconButton( | |
onPressed: () {}, | |
icon: const Icon( | |
Icons.add, | |
)), | |
IconButton( | |
onPressed: () {}, | |
icon: const Icon( | |
Icons.delete, | |
)), | |
], | |
), | |
Text("합계: ${numberFormat.format(price * quantity)}원"), | |
], | |
), | |
), | |
], | |
), | |
); | |
} | |
} |
[유튜브 강좌 영상]
'모바일어플개발 > Flutter 실전어플 개발' 카테고리의 다른 글
[006] 플러터 (Flutter) 실전어플제작 - 쇼핑몰 앱 제작(UI구성6 - 제품 결제시작 페이지 만들기 3) (1) | 2023.11.04 |
---|---|
[005] 플러터 (Flutter) 실전어플제작 - 쇼핑몰 앱 제작(UI구성5 - 제품 결제시작 페이지 만들기 2) (2) | 2023.10.14 |
[004] 플러터 (Flutter) 실전어플제작 - 쇼핑몰 앱 제작(UI구성4 - 제품 결제시작 페이지 만들기 1) (1) | 2023.10.09 |
[002] 플러터 (Flutter) 실전어플제작 - 쇼핑몰 앱 제작(UI구성2 - 제품 상세 페이지 만들기) (0) | 2023.09.28 |
[001] 플러터 (Flutter) 실전어플제작 - 쇼핑몰 앱 제작(UI구성1 - 제품 리스트 페이지 만들기) (0) | 2023.09.24 |