2023. 4. 1. 15:23ㆍ모바일어플개발/Flutter
안녕하세요~ totally 개발자입니다.
Carousel Slider + Indicator
이 시간에는 carousel_slider 라이브러리를 사용하여 슬라이더를 indicator(현재 어느 슬라이드인지, 클릭하면 해당 슬라이드로 이동할 수 있게 도와주는 역할)와 함께 간단히 만들어보도록 하겠습니다. 물론 라이브러리를 사용하지 않고도 ListView를 활용하여 구현할 수 있으나 다소 복잡하기 때문에 라이브러리 사용을 권장드립니다.
Step 1: pubspec.yaml에 carousel_slider: 를 추가해줍니다.

Step 2: 필요한 변수들을 선언해줍니다. _current는 현재 슬라이드 위치를 나타내는 인덱스값, _controller는 슬라이더를 조작할 수 있도록 해주는 컨트롤러, imageList에는 필요한 샘플 이미지들을 넣어줍니다.

Step 3: sliderWidget을 별도로 선언해줍니다. 여기에서 imageList의 map를 활용해서 리스트에 있는 요소 숫자만큼 슬라이드를 반복적으로 만들어줍니다. 그리고 options 부분에는 슬라이드의 속성 값을 지정해줄 수 있는데 viewportFraction: 1.0을 넣으시면 여백 없이 채워진 이미지로 만들 수 있습니다. autoPlay: true를 넣으면 슬라이더 자동 재생 기능 활성화, autoPlayInterval는 자동 재생 시간을 몇 초 간격으로 지정할 것인지 여부, onPageChanged는 슬라이드의 페이지가 변할 때 어떤 기능을 담당할 것인지를 지정합니다.

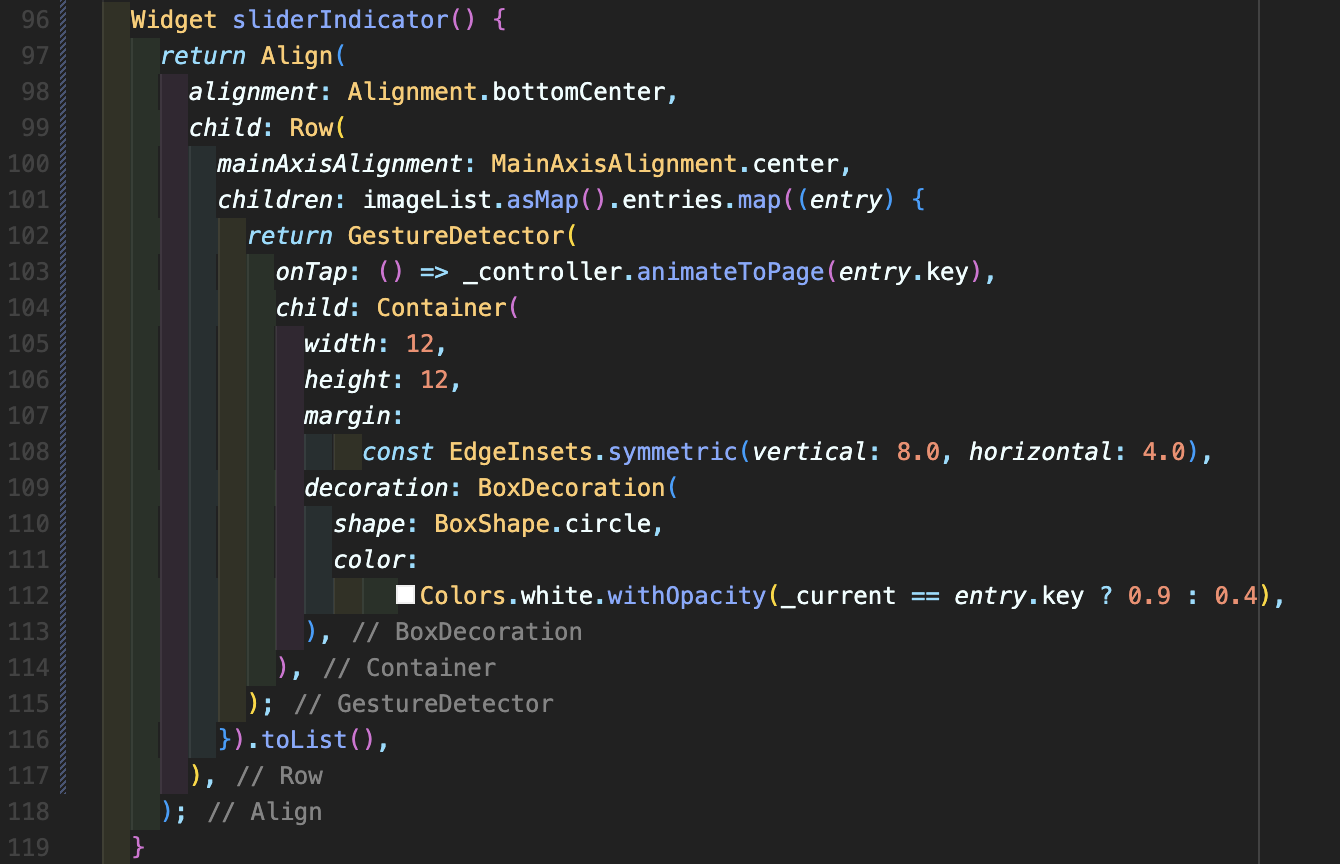
Step 4: 다음으로는 sliderIndicator에 관한 위젯을 작성해주고 여기에는 imageList.asMap().entries.map((entry) 형식으로 작성해주는데 그 이유는 현재 imageList 변수에는 이미지 리스트 밖에 없지만 각 key의 인덱스값 0~4를 받아오기 위한 방편이고 map으로 key, value 형식으로 만들어주기 위해서 사용합니다. 103번째의 _controller.animateToPage(entry.key)를 사용하여 각 슬라이드로 손쉽게 이동할 수 있도록 도와줍니다.
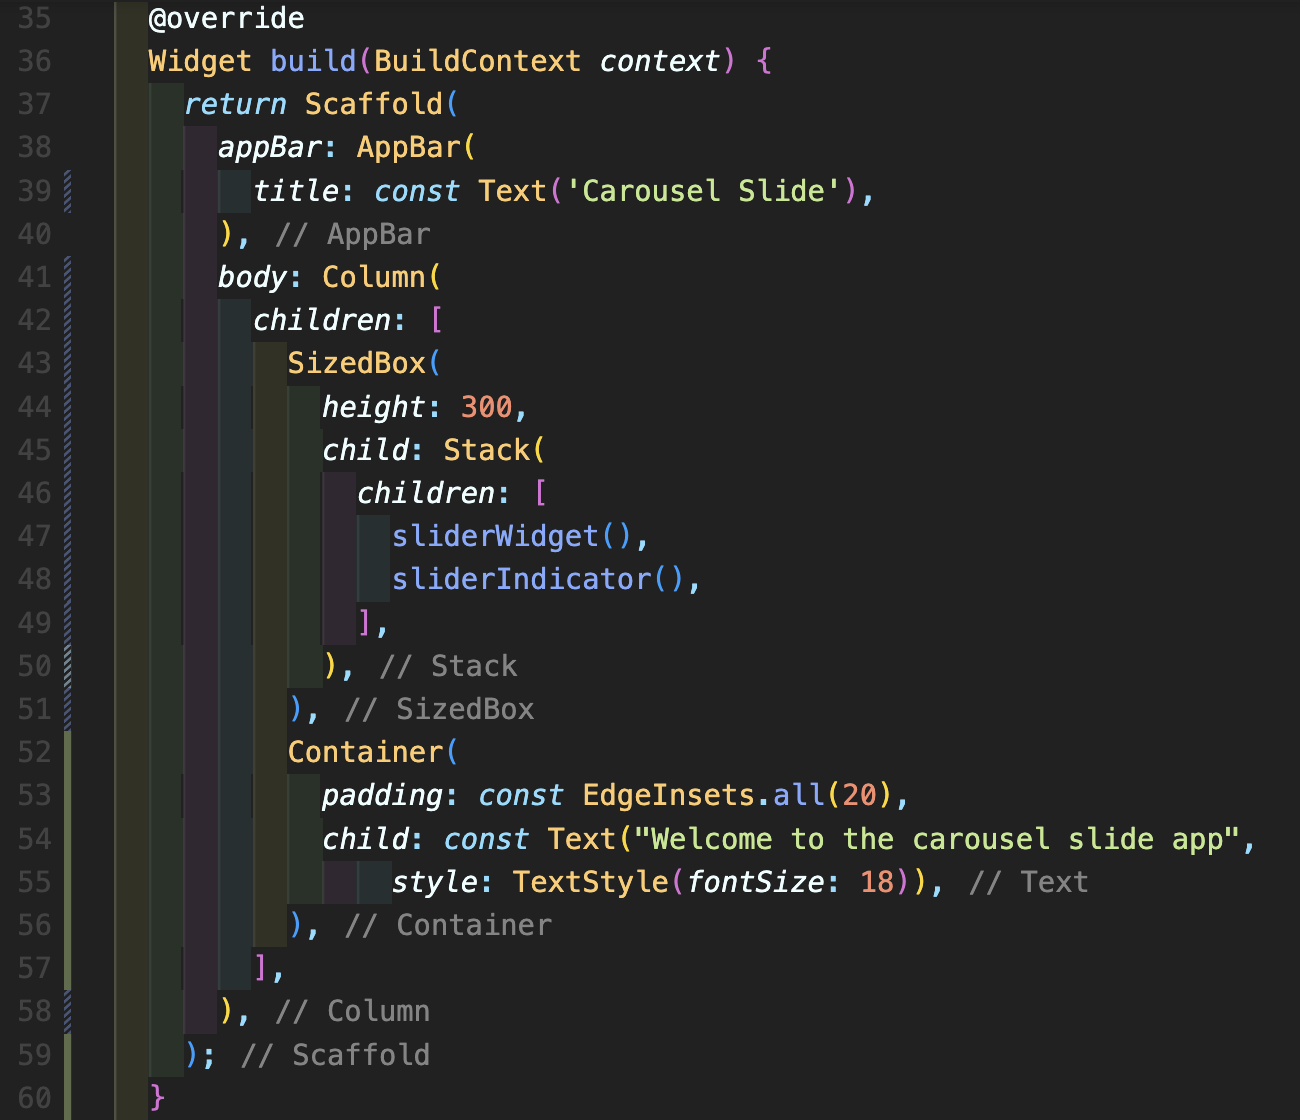
Step 5: build 위젯을 완성해줍니다. sliderWidget 위에 sliderIndicator를 띄워 놓기 위해서는 Stack(중첩 위젯)을 사용하시면 되며 Stack을 Container나 SizedBox로 높이를 지정해서 감싸주시면 됩니다. 그러면 위에 slideIndicator에 선언된 Align 위젯의 alignment: Alignment.bottomCenter 속성을 바로 사용해서 슬라이드 부분의 중앙 하단에 간단히 배치할 수 있습니다. 그 후에 현재 body: Column으로 감싸주고 있으므로 슬라이드 아래에 배치할 위젯들을 차례로 추가 배치하시면 됩니다.
Step 6: 작동 모습입니다.

References:
https://pub.dev/packages/carousel_slider
carousel_slider | Flutter Package
A carousel slider widget, support infinite scroll and custom child widget.
pub.dev
[전체 소스 코드]
import 'package:flutter/material.dart'; | |
import 'package:carousel_slider/carousel_slider.dart'; | |
void main() { | |
runApp(const MyApp()); | |
} | |
class MyApp extends StatelessWidget { | |
const MyApp({Key? key}) : super(key: key); | |
@override | |
Widget build(BuildContext context) { | |
return const MaterialApp(title: 'Flutter App', home: HomePage()); | |
} | |
} | |
class HomePage extends StatefulWidget { | |
const HomePage({Key? key}) : super(key: key); | |
@override | |
State<HomePage> createState() => _HomePageState(); | |
} | |
class _HomePageState extends State<HomePage> { | |
int _current = 0; | |
final CarouselController _controller = CarouselController(); | |
List imageList = [ | |
"https://cdn.pixabay.com/photo/2014/04/14/20/11/pink-324175_1280.jpg", | |
"https://cdn.pixabay.com/photo/2014/02/27/16/10/flowers-276014_1280.jpg", | |
"https://cdn.pixabay.com/photo/2012/03/01/00/55/flowers-19830_1280.jpg", | |
"https://cdn.pixabay.com/photo/2015/06/19/20/13/sunset-815270_1280.jpg", | |
"https://cdn.pixabay.com/photo/2016/01/08/05/24/sunflower-1127174_1280.jpg", | |
]; | |
@override | |
Widget build(BuildContext context) { | |
return Scaffold( | |
appBar: AppBar( | |
title: const Text('Carousel Slide'), | |
), | |
body: Column( | |
children: [ | |
SizedBox( | |
height: 300, | |
child: Stack( | |
children: [ | |
sliderWidget(), | |
sliderIndicator(), | |
], | |
), | |
), | |
Container( | |
padding: const EdgeInsets.all(20), | |
child: const Text("Welcome to the carousel slide app", | |
style: TextStyle(fontSize: 18)), | |
), | |
], | |
), | |
); | |
} | |
Widget sliderWidget() { | |
return CarouselSlider( | |
carouselController: _controller, | |
items: imageList.map( | |
(imgLink) { | |
return Builder( | |
builder: (context) { | |
return SizedBox( | |
width: MediaQuery.of(context).size.width, | |
child: Image( | |
fit: BoxFit.fill, | |
image: NetworkImage( | |
imgLink, | |
), | |
), | |
); | |
}, | |
); | |
}, | |
).toList(), | |
options: CarouselOptions( | |
height: 300, | |
viewportFraction: 1.0, | |
autoPlay: true, | |
autoPlayInterval: const Duration(seconds: 4), | |
onPageChanged: (index, reason) { | |
setState(() { | |
_current = index; | |
}); | |
}, | |
), | |
); | |
} | |
Widget sliderIndicator() { | |
return Align( | |
alignment: Alignment.bottomCenter, | |
child: Row( | |
mainAxisAlignment: MainAxisAlignment.center, | |
children: imageList.asMap().entries.map((entry) { | |
return GestureDetector( | |
onTap: () => _controller.animateToPage(entry.key), | |
child: Container( | |
width: 12, | |
height: 12, | |
margin: | |
const EdgeInsets.symmetric(vertical: 8.0, horizontal: 4.0), | |
decoration: BoxDecoration( | |
shape: BoxShape.circle, | |
color: | |
Colors.white.withOpacity(_current == entry.key ? 0.9 : 0.4), | |
), | |
), | |
); | |
}).toList(), | |
), | |
); | |
} | |
} |
[유튜브 강좌 영상]
'모바일어플개발 > Flutter' 카테고리의 다른 글
[049] 플러터 (Flutter) 배우기 - Singleton (싱글톤) 개념 이해하기 (0) | 2023.04.04 |
---|---|
[048] 플러터 (Flutter) 배우기 - Factory Pattern (팩토리 패턴) 이해하기 (0) | 2023.04.03 |
[046] 플러터 (Flutter) 배우기 - ListView.builder + 스크롤 Pagination 적용 (4) | 2023.03.30 |
[045] 플러터 (Flutter) 배우기 - Widget Test (위젯 테스트) (0) | 2023.03.21 |
[044] 플러터 (Flutter) 배우기 - Unit Test (단위 테스트) (0) | 2023.03.21 |